Looking to spruce up your living space without breaking the bank? Why not try DIY home improvement projects? Not only can DIY be cost-effective, but it also allows you the satisfaction of completing projects yourself and creating a home that reflects your unique style.
This guide offers 5 beginner-friendly projects
that require minimal experience and can be tackled with confidence.
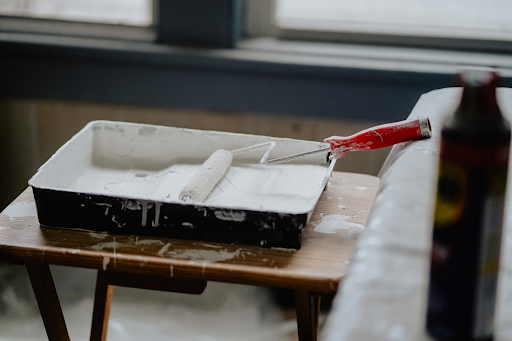
1. Painting Your Interior Walls
Painting your interior walls is a fundamental DIY project that offers a high-impact transformation for minimal investment. Here's a detailed guide to help you navigate this project successfully:
Choosing the Right Paint
- Paint Types: Opt for latex paint for its easy cleanup and moisture resistance.
- Color Selection: Lighter colors open up a space, while darker ones add drama. Consider room size and natural light.
- Paint Finishes: Flat paint hides imperfections but isn't scrubbable. Satin offers a sheen for better cleaning. Semi-gloss/gloss are ideal for kitchens and bathrooms due to their cleanability but highlight imperfections.
Painting Techniques for a Professional Look
- Brush vs. Roller: Use brushes for edges and trim, rollers for larger areas. Choose a roller nap size suited to your paint and finish.
- Edging Tips: Apply painter's tape for clean lines where the wall meets the trim. Remove while paint is wet for best results.
- Cleanup Advice: Clean spills immediately with a damp rag. Use a drop cloth to catch drips.
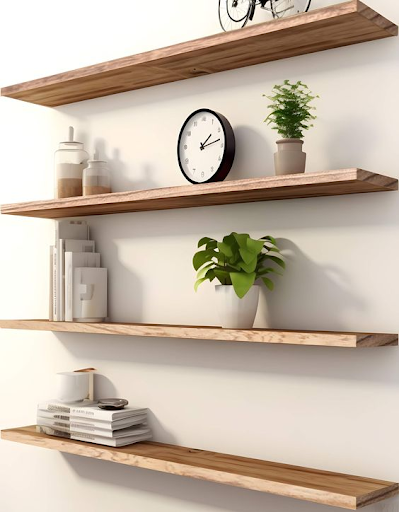
2. Installing Floating Shelves
Floating shelves are a versatile and space-saving storage solution that can elevate the look of any room. Here's a comprehensive guide to help you install your own set of floating shelves:
Selecting the Best Materials
- Wood Types: Pine or MDF are popular choices for their affordability and sturdiness. Consider plywood for lighter shelves.
- Hardware: Select brackets that can support the weight you intend to place on the shelves. Look for heavy-duty brackets for substantial items.
- Weight Capacity: Think about the weight of your decorative items or books before purchasing materials. Ensure your chosen hardware matches the weight limit.
Step-by-Step Installation Guide
- Wall Preparation: Ensure the wall is clean, level, and marked for bracket placement. Use a stud finder to locate wall studs for added support when mounting the brackets.
- Leveling: Use a level to ensure the brackets are perfectly horizontal before securing them to the wall with appropriate screws and anchors.
- Securing Shelves: Attach the shelves securely to the brackets using the recommended screws or fasteners according to the hardware specifications.
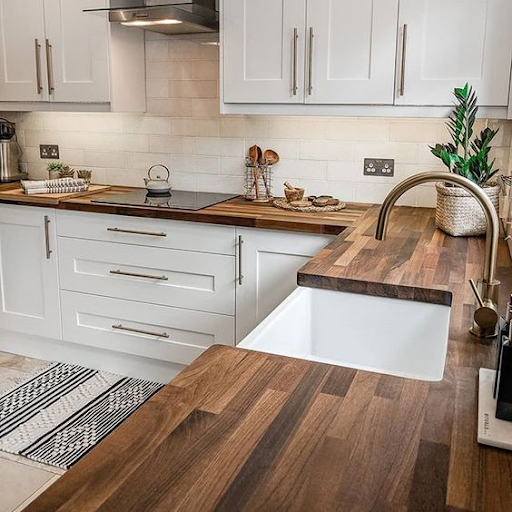
3. Updating Cabinet Hardware
Cabinet hardware may seem like a small detail, but it can significantly impact the overall look and feel of your kitchen or bathroom. Here's a guide to help you choose and install new hardware for a quick and impactful upgrade:
Hardware Styles and Where to Find Them
- Knobs vs. Pulls: Knobs are ideal for single-door cabinets, while pulls work well for drawers and double doors. Consider the functionality and style you desire.
- Style Matching: Choose hardware that complements the existing style of your cabinets and faucets. Modern pulls can update traditional cabinets, while classic knobs can elevate a sleek kitchen.
- Best Retailers: Hardware stores, home improvement centers, and online retailers offer a vast selection of hardware in various styles, finishes, and materials to suit your taste and budget.
Tools and Techniques for Installation
- Drilling Holes: Some new hardware may require drilling new holes in your cabinets. Ensure you have the right drill bit size for the hardware screws.
- Aligning Hardware: Use a level to ensure your hardware is straight and evenly spaced for a polished look. Mark placement beforehand for drilling accuracy.
- Tools Needed: A screwdriver or drill will likely be sufficient for most hardware installations. However, the specific tools may vary depending on your existing hardware and the new installation.
4. Creating a Kitchen Backsplash
A beautiful and functional backsplash can elevate your kitchen design while protecting your walls from splashes and stains. Here's a detailed guide to help you create a stunning backsplash yourself:
Choosing Materials That Fit Your Style
- Tile Options: Explore the vast world of backsplash tiles! Ceramic, glass, or stone tiles offer classic beauty and durability. Consider peel-and-stick options for a user-friendly alternative.
- Peel-and-Stick Products: These innovative tiles come in various styles and colors, offering a renter-friendly or time-saving solution. They adhere easily to most clean, flat surfaces.
- Grout Choices: For tiled backsplashes, choose a grout color that complements your tiles and countertops. Consider sanded grout for easier cleaning and unsanded grout for a smoother look.
Essential Steps for a Durable Backsplash
- Surface Preparation: Ensure the wall behind your backsplash is clean, level, and free of dust or debris. Patch any holes or imperfections for a smooth application.
- Tile Laying Techniques: Follow the manufacturer's instructions for proper tile placement and grouting, especially regarding spacing and adhesive use.
- Sealing and Finishing: Once the grout cures completely, seal the grout (if applicable) to prevent moisture damage and enhance the overall look. Use a sealant recommended for your specific grout type.
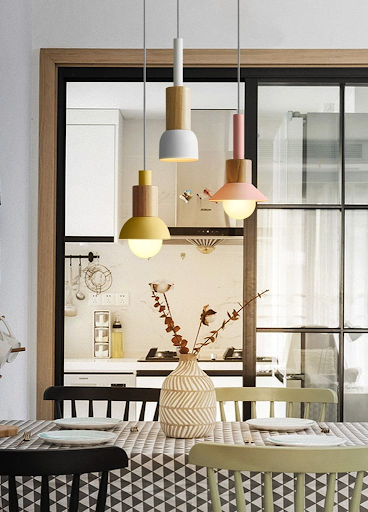
5. Enhancing Room Lighting
Lighting plays a crucial role in setting the ambiance and functionality of a room. Here's a beginner-friendly guide to tackle some basic lighting updates and transform your space:
Types of Lighting Fixtures Suitable for DIY
- Ceiling Lights: Replace outdated ceiling fixtures with modern pendants or flush mounts. Consider the size and style of your room when choosing new fixtures.
- LED Strips: Add LED strips under cabinets or behind shelves for a touch of accent lighting. These energy-efficient strips come in various colors and can be controlled with dimmers or remote controls.
- Ambient Lighting: Consider installing dimmer switches for your existing overhead lights. This allows you to adjust the lighting level, creating a cozy atmosphere for evenings or brighter light for tasks.
Electrical Safety Tips for Beginners
- Circuit Basics: Before attempting any electrical work, understand which circuit powers the light fixture you're replacing. If unsure, consult a qualified electrician.
- When to Call a Professional: If you're uncomfortable working with electrical wiring, or if the project involves replacing a light switch or installing a new circuit, it's best to hire a licensed electrician to ensure safety.
- Safe Wiring Practices: Always turn off the power to the circuit at the breaker box before working on any light fixtures. Use wire nuts or approved connectors to join electrical wires securely.
Conclusion
Remember, these five projects are just the beginning! Embrace the learning process, start small, and gradually build your skills. With preparation, a little effort, and the resources available to you, you can transform your home into a beautiful and personalized space. Most importantly, have fun and enjoy the journey of creating a home that reflects your unique style!
FAQs about DIY Home Improvement Projects for Beginners
Q: What are the best DIY projects for increasing home value?
While prioritizing personal satisfaction is key, some DIY projects offer a strong return on investment. Consider painting, updating hardware, refreshing light fixtures, or sprucing up your landscaping.
Q: How do I choose the right tools for DIY home projects?
Start with a basic toolbox containing a hammer, screwdrivers, a level, a tape measure, and a utility knife. Research the specific tools required for your project and prioritize quality over quantity.
Q: What safety precautions should I take when doing DIY projects?
Safety is paramount! Always wear appropriate eye protection, gloves, and sturdy footwear. When working with electricity, turn off the power at the breaker box. Don't hesitate to consult a professional for tasks beyond your comfort zone.
Q: How can I learn DIY skills as a beginner?
The internet offers a wealth of tutorials and resources.
Consider local options too!
Hardware stores and libraries often host workshops, and there are many beginner-friendly DIY books available.
Q: What are some common mistakes in DIY home improvement and how can I avoid them?
- Improper planning: Take time to plan and research your project.
- Underestimating the scope: Be realistic about your skills and time commitment.
- Rushing the process: Take your time for quality results.
- Choosing the wrong materials: Invest in quality materials that suit the project
You might also like